Showing posts with label D.Y.I Home deco. Show all posts

Thursday, March 31, 2011

Flower Mobile

So I made this for Raley when we first moved back in with my Parents like a year ago. I saw one like it in Pottery Barn Kids and It was so pretty! But I never took and Pictures of me making it. Its not hard, at all. Just get ready to burn the tips of your fingers a lot!

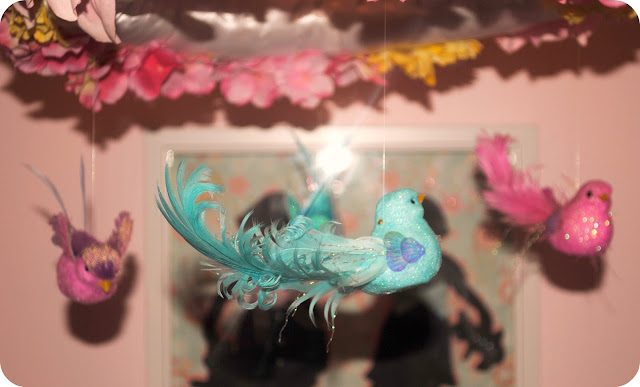
What I did was buy the flowers at Michael's and popped them off the steam, then hot glued the flower on all  over! I used clear thread to hang the birds and attached the clear thread with a tiny nails, on in the wreath then one in the bird, and hot glue so it would not come out.


I am working on a post of my sisters green house that she is building from windows  its killer, she and her husband made it from Glass window they bought! Also I am making raised garden beds I have one done and the second almost done! Along with my trying new things idea I thought I would try skateboarding, yep. Give me something to do this summer while the Girls play in the driveway. But the skateboard is super ugly so I am going to jazz it up , it will be turquoise with doilies!!

Tuesday, March 22, 2011

Vinyl Cricket Fake Windows !!


The basement is the girls Playroom/our craft room for the most part. So recently I panted the walls white and that made it so much better but then we were left with HUGE REALLY WHITE walls. So my mom came up with this idea in there "house" area. They are above the kitchen and are windows looking out from inside there house! Its not done yet but almost and it turned out really cute!! Lilly loooooves it! My mom just used her cricket and vinyl ! It was a little tricky to get it all on straight but the more you get on the easier it is to move later, it makes it thicker and not as flimsy.

Wednesday, January 13, 2010

Burlap matting


I thought I would show these, I didn't take before pics because I did these long before I thought about doing a blog. But with all the burlap craze in blog land I thought maybe someone could do something fun with this idea!!! All three picture frames are different because I didn't want to pay a lot of money to buy frames, these I got at goodwill and found in my parents basement! You have to love free!! These prints from pottery barn and I love them !! I spray painted the frames white. The prints I laid out on my kitchen table and then measured the white space between the print and the end of the picture I believe it was 4 inches all around. I used the cardboard backing from the old prints and laid my new print on top of it and secured it with little scrapbook sticky squares on the back of the picture. I then put my burlap on top of the print and put the frame on without the glass in it, to hold the burlap in place. I then cut out my square so you could see the picture. When I cut the square in the burlap I made it just a half an inch bigger then where my white begun so I could fold it under. Burlap frays really bad and I wanted a clean finish around the picture that is why I folded it under. Now to hold the burlap fold down I used a peachy colored thread that was my grandmas! She has past on so I like to do something special with the things that were hers and this way when I look at the pic I will always think of her when I see the thread!! Anywho, I just did a quick hand stick around the folded edge and then took hot glue and glued the fold down so it all stayed nice and tight! Then popped the frame off put the glass back in and nailed the back of the frame back on and all done!! I am sure was not the easiest to follow but I will try to take step by step pics from now on!!