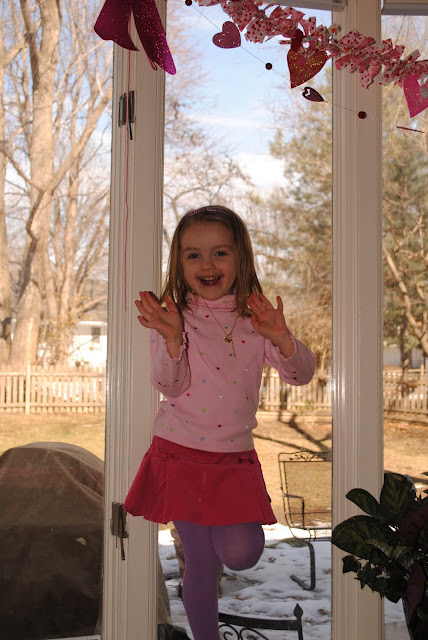
Sooo I am reeeeally late posting this but I have had to sick babies with BronchLEitis which is just a cute name for bronchitis for kids :( Anyways I made this count down chart for Lilly! It has two pieces of paper in each pocket. The first paper says a reason why I love her and the second is a valentine that I printed off and wrote on the back with sparkly gel pens and on the back each day I have a art activity and a baking activity!! Simple is key otherwise I get too busy and to get the time to do it or forget until its five till eight and eight is bedtime and there's no way Iam starting an activity then I am ready to relax!! I used these sites for there AMAZING ideas!! Thanks !!!
This is the site I used for the "I love you because..." paper!! Such a great idea!!!
http://site.shabbychiccrafts.com/free-tags/valentine_advent_cards.pdf
I used Printable Cards from this site
http://www.oneprettything.com/
Seriously one of my Favorite websites!! I definitely lerk this page :)
I made these for the girls but did not quite get finished with Raleys :( I also made one for Betsy (Lilly's doll from PBK that she got for Christmas) I just cut everything down to 5 inches. It worked perfect!! It would work for any doll from Bitty Baby size to 18 inch!Lilly took hers to school and I am using them this morning for the V-day gifts!!
http://ourscoop.blogspot.com/2009/01/valentine-chair-backers.html
Baking:
1:Rice crispy hearts:
http://www.aprettycoollife.com/2011/01/valentine-flashback-rice-krispie-treats.html
2:Cupcake Sandwich:
http://sweetcraftcakes.blogspot.com/2011/01/sweet-treats-cupcake-sandwich.html
3 and 4 :Cookies with chocolate hearts and marshmallow dipped in choclet:
http://www.aprettycoollife.com/2010/02/random-acts-of-kindness.html
5:Sweetheart S'mores: http://wegrowbyourdreams.blogspot.com/2011/01/sweetheart-smores.html?spref=fb
6:Candy Doilies:
http://shabbychiccrafts.blogspot.com/2011/01/diy-doilie-hearts.html
7:Cake mix cookies:
http://www.positivelysplendid.com/2011/01/valentine-treat-in-flash.html
8:Heart shape pancakes:
https://blogger.googleusercontent.com/img/b/R29vZ2xl/AVvXsEhC9k24BCATm7mKP1yQzHc5G9B_O1Y_9Uj3QqbBakfFqqKWtR6V9zoBBrku8jtzLsGrHeNxfvTMTJx-IKlTKUq73qK3JDTDvoru8Ii-qYGOZJKG1n7jSd5nTqTZvhmaxK-0cAEW3JlivwY/s1600/2.JPG
9: Cookie Pops:
http://www.theidearoom.net/2010/02/valentine-cookie-pops.html
10:Sandwich cookies:
http://www.theidearoom.net/2010/02/more-valentines-day-treats.html
11: Dipped Wafers: Melt chocolate, dip, then roll in sprinkles! http://www.layercakeshop.com/dailymixer/wp-content/uploads/2010/12/DippedWafers2f2.jpg
12:Sparkly Marshmallows: http://www.thedecoratedcookieblog.com/2010/01/heart-day-sparkly-marshmallows.html
13:Homemade Marshmellows:
http://alisaburke.blogspot.com/2011/02/homemade-marshmallows.html
14:Heart Pancakes!!: http://sara-mincy.blogspot.com/2010/02/heart-pancakes.html
Art:
1: Marble rolling:I intended to use these for the Doily garland but ended up sending them with a package to the girls grandparents http://www.kidcraftsmagazine.com/holidays/valentinesday/marble-rolling-hearts
2: Tissue Paper stained Glass hearts:
http://weefolkart.com/content/tissue-paper-stained-glass-hearts
3: Snow Globes:
http://www.womansday.com/Articles/Lifestyle/Crafts/Heart-Snow-Globe.html
4:Hand print Pictures: http://rootsandwingsco.blogspot.com/2010/01/handprint-valentine-hearts.html
5:Fuzzes:
http://speckless.wordpress.com/2011/01/21/valentine-smack-down-warm-and-gentle-fuzzies/
6:Gumball necklaces: Lilly's class at school is all girls ! So I made these for them!! They turned out soooo cute!!
http://onecharmingparty.com/2011/01/19/valentine-gumball-necklaces/
7:V-Day Play doe!! Pink, Purple,red and white with Glitter to make it sparkly!! Soooo note to self (Or anyone else who apperiantly did NOT know this) Do Not I repeat do NOT use Wilton baking gel becuase you think the colors are totally rade and bright because they look just as rade and bright on your hands for the next two days, My sister stared at me in horror as I bounced into Chariming Charle for a shopping trip with my blood red hands... rings really do not look good on red hands it brings the wrinkles out! So I will be wearing gloves next time!!
8:Painting with sponge heart shapes, cute out hearts in different sizes with sponges we also had large stencils of hearts and the alphabet that we used to paint with
9:Crayon with wax paper hearts! Take crayon shavings( The thin kind from a pencil sharpener)I could not find a pencil sharpener for the life of me so I broke out my eye liner sharpener! Put a piece of wax paper down then shavings on top of it then wax paper on top of that to sandwich it waxy side together and use (adult) hot iron!
10: Made Valentines to send to family! Used scrapbook paper, Stencils, stickers, decorative punch etc.
11: Made scrapbooks for Family, I was going to do the $4.98 option at walmart but then I found some cute scrapbooks in the dollar bin at target!!
12:Glitter heart chain: We would skip the wire and just staple together so its easier for Lilly and she would be able to do the whole thing "All by myself!!" then dip the front and back edges in glue the glitter.I would recommend doing front first, let dry, then the back and let dry. Otherwise its going to turn into a "drys to everything, glitter and glue everywhere, kids crying mess... juuuust saying!!
http://craftystaci.com/2011/01/31/paper-and-wire-hearts/
13: Heart shaped felt bean bags: Use doilies as targets or standing spots, be creative!
14:Make crayon Hearts! Use silicon molds that is oven safe(I know target has them in the dollar bin) Use broken crayons, melt in oven, pop out, walla!
Cute Decorations:
1: Heart Doily Garland: http://agirlinagorillasuit.blogspot.com/2011/01/heart-doily-garland.html
2:Wreath:
http://sweetbeebuzzings.blogspot.com/2011/01/i-heart-fabric-wreaths.html
3: Rag Garland: I made this and it turned out super cute!! I got plan wood hearts from Joann's and let Lilly paint them then I put mod podge on them and sprinkled the glitter!!
http://3fourandunder.blogspot.com/2010/01/valentine-rag-garland-tutorial.html
4: Rose's:
http://snips-and-spice.blogspot.com/2011/01/felt-roses.html
5: Cupcake wreath:
http://tatertotsandjello.blogspot.com/2010/01/whimsical-valentine-wreath.html
6: Be mine garland:
http://www.polkadotchair.com/2010/02/how-to-be-mine.html
I made glitter V-day houses, Some poodles,styrofoam Birds and these adorable clothesline girls!! http://creativebreathing.blogspot.com/2011/01/poodle-tut-for-you.html
Clothesline girls/ Birds
https://blogger.googleusercontent.com/img/b/R29vZ2xl/AVvXsEjzKAMmx6WrwIVPUM38zuhg7U1_l29oXnA87vwx7rfssp2xngfcvS76ev5JPndIk4klyKh7sTB4shjFbD_acGC7V5SFbODmfMOMhktxo545esqIqU-bcPEouTNe_W1fm6BpRHluBS6x2Crf/s1600/049.JPG
http://creativebreathing.blogspot.com/2011/01/champaign-music.html
http://creativebreathing.blogspot.com/2011/01/redbirds-in-snow.html
Cute Packaging
1: Vintage box: http://www.craftjr.com/valentine-treat-bags/vintage-valentine-treat-bag/
Cute V-Day things to make!!!:
Owl for Raley: http://agirlinagorillasuit.blogspot.com/2011/01/heart-doily-garland.html
Matching game for Lilly: http://www.bluecricketdesign.net/2010/01/freaky-friday-ruffles-and-stuff.html
I am going to another one for Easter and hope this time to get all the info BEFORE Easter instead of two days after!!!


